Getting Started
Welcome to DocProcessor! The Getting Started Guide shows you how to create your first template and generate a document. It is a brief introduction and you can read a detailed explanation of every feature in corresponding topics.
Basically, templating is a simple process that involves just a few steps. A template is an office document with placeholders. We support various types of documents such as DOCX, XLSX, and PDF. We are going to create a DOCX template, however, the principle is the same for every type of document, only small details differ.
Follow this guide using our example so that if you have any troubles you can easily compare your work with it.
Files to download:
- time-off-form_empty.dotm - a time off request form without data
- time-off-form_final.docx - a time off request form with placeholders
Steps to complete:
- Create a document with placeholders
- Upload the template to the system
- Prepare a data source
- Start document generation and wait for a result
See also:
Step 1: Create a document with placeholders
A placeholder is a place in your document where a value can be substituted.
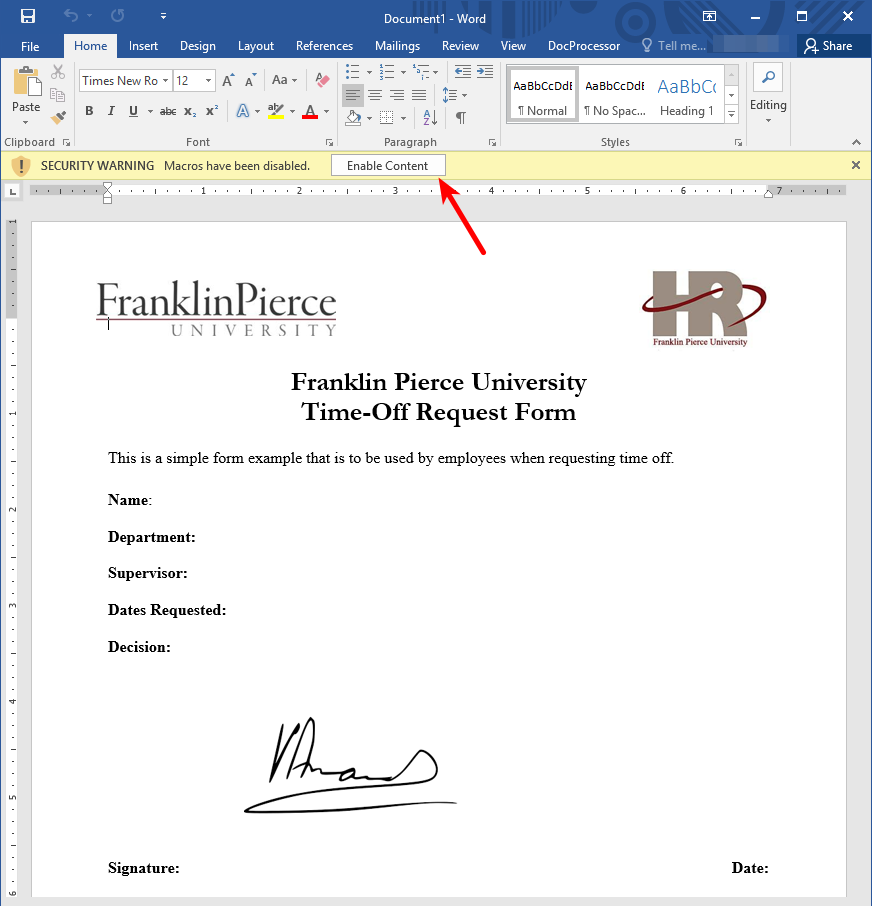
- Open
time-off-form_empty.dotm file in MS Word. This file contains macros. We implemented an easy to use
MS Word Add-In with buttons which allows you to create and delete placeholders. This Add-In is secure and
you can enable it (you can read more about it in
Placeholders In DOCX topic).
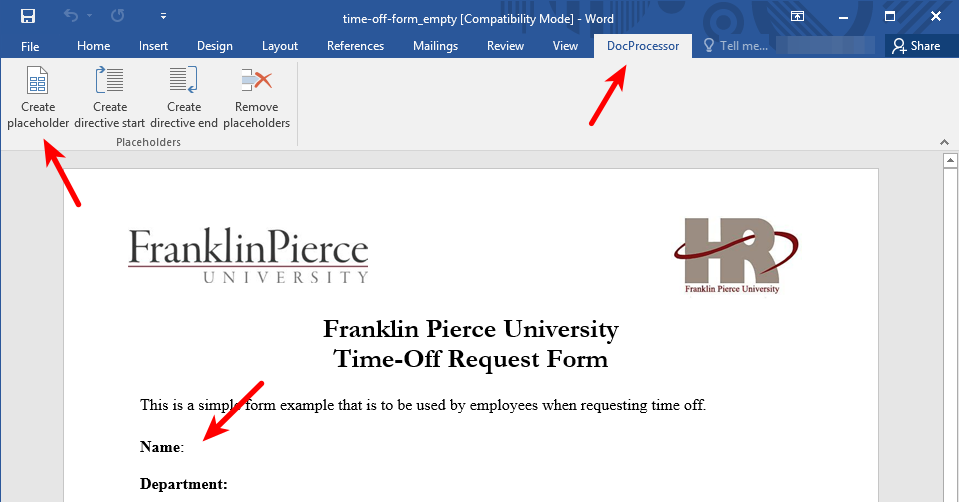
- As you can see this document is not filled. Lets create placeholders where data need to be substituted. Click
on 'DocProcessor' tab and you will see a panel with buttons. Lets create a placeholder for the 'Name'
field in the document. Click next to the 'Name' label to select a place and then click
on 'Create placeholder' button:
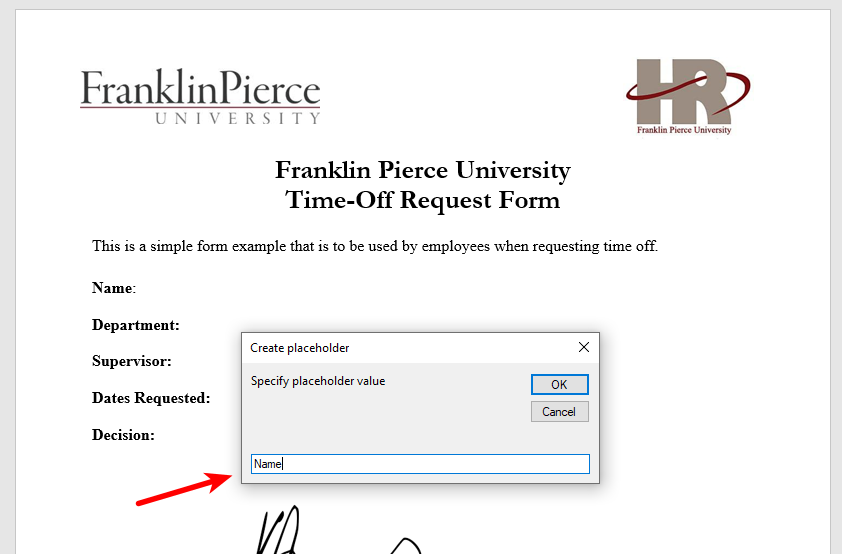
- You will see a dialog where you need to type a name of the field. Type 'Name' and then click 'Ok':
- Now your placeholder is created. You can see that it has a special look with brackets:
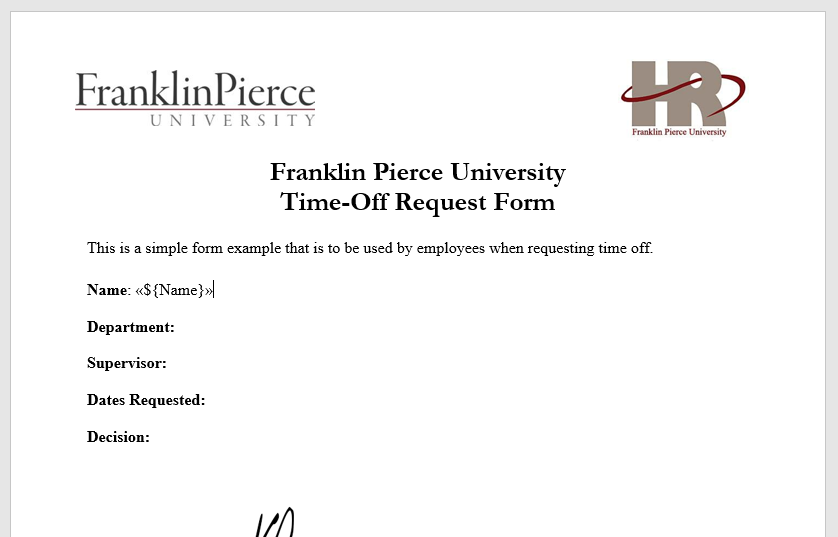
Before we continue working, there is one important thing you should follow for now: don't modify created placeholder in a usual way, that is clicking on it and typing or something else. If you need to change placeholder you can simply delete it as a text completely and then create again. You can read about this in details in Placeholders In DOCX topic.
- Create placeholders for "Department" and "Supervisor" fields the same way.
- Field 'Dates Requested' would contain date values. Date type differs from the plain text because
it gives you a possibility to do calculations. You can't simply write
StartDate, instead, you must write it asStartDate?datelike in the following: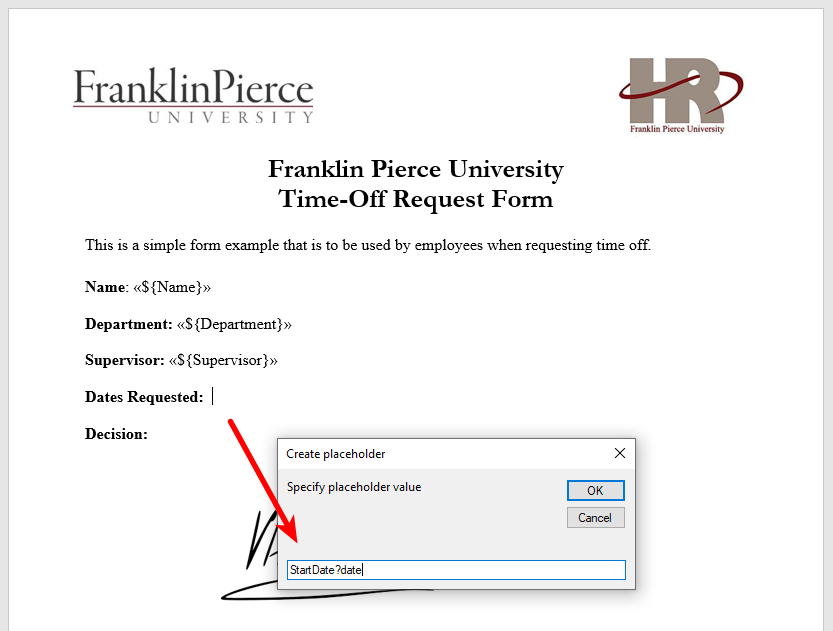
Such notation means that you want to use only a date part of the value without time information. There are more details about this, however, it is enough to create a simple date value placeholder. You can read more about dates in Expressions and advanced features topic and Built-ins for datetime FreeMarker documentation.
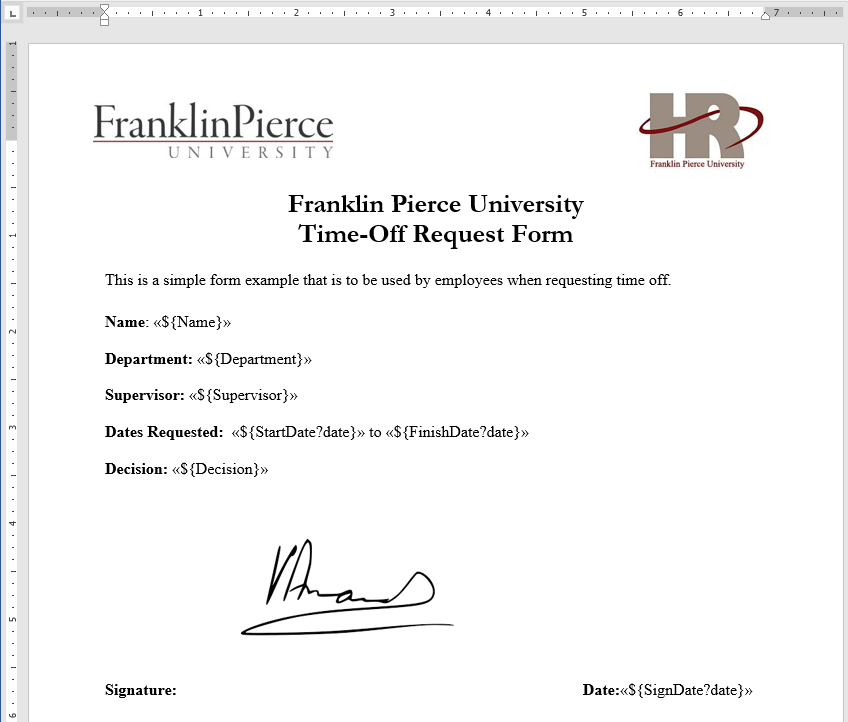
- Add placeholders for remaining fields. The final template will look like the following one:
Now your document template is ready. You can save it and upload to the system.
Step 2: Upload the template to the system
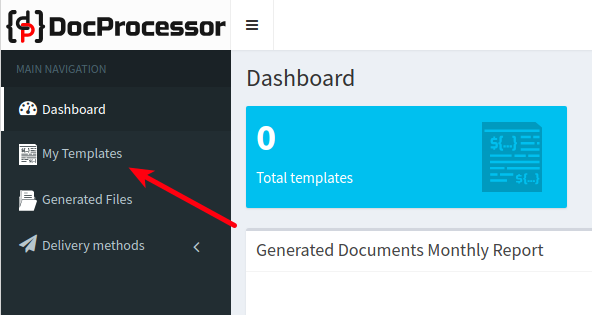
You manage templates on 'My Templates' page, use navigation tab that is on the left side of the screen
to open it.
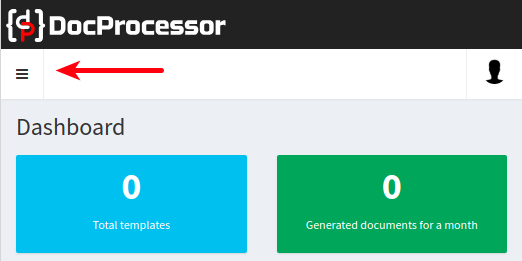
Navigation tab can be collapsed on devices with small screen size and if you can't see it then click on
the expand button to show it.
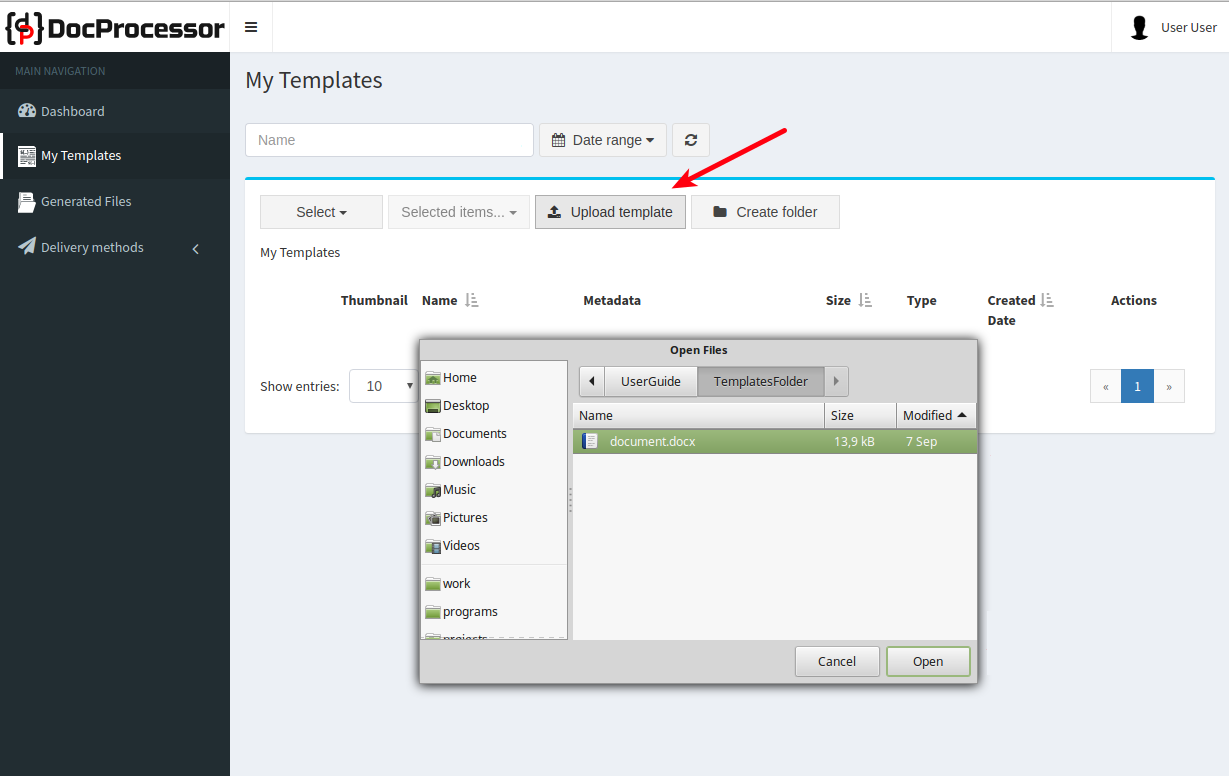
To upload a file you can simply drag and drop it into the main table.
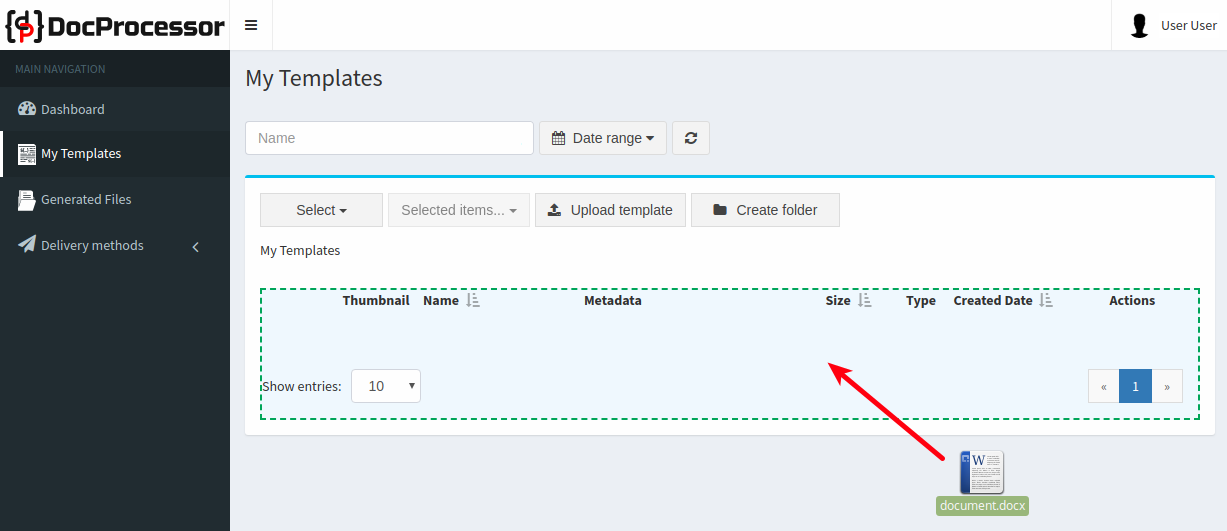
You can also click on the 'Upload template' button and choose your template in the browser's modal
dialog.
Before upload starts you will see a modal dialog with a form asking you to provide configuration for
your template.
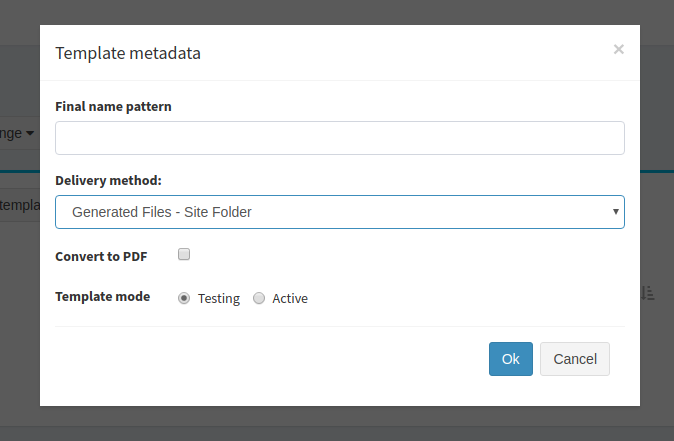
Actually, default values that you can see on this form are technically valid and safe for you. You can simply click 'Ok' button and go on for now, but if you are interested, here is what they mean:
- Final name pattern is empty which means the generated file will have the same name as the template file
- Delivery method: the generated file would be saved in DocProcessor (available only for your account)
- Convert to PDF is unchecked so your generated files will have the same format as the template file
- Template mode is 'Testing', which means you won't pay for the generation for this template file, but a watermark will be added to the result
Of course, it is important for you to revise this form later and you can get full information about it on Configure Template page.
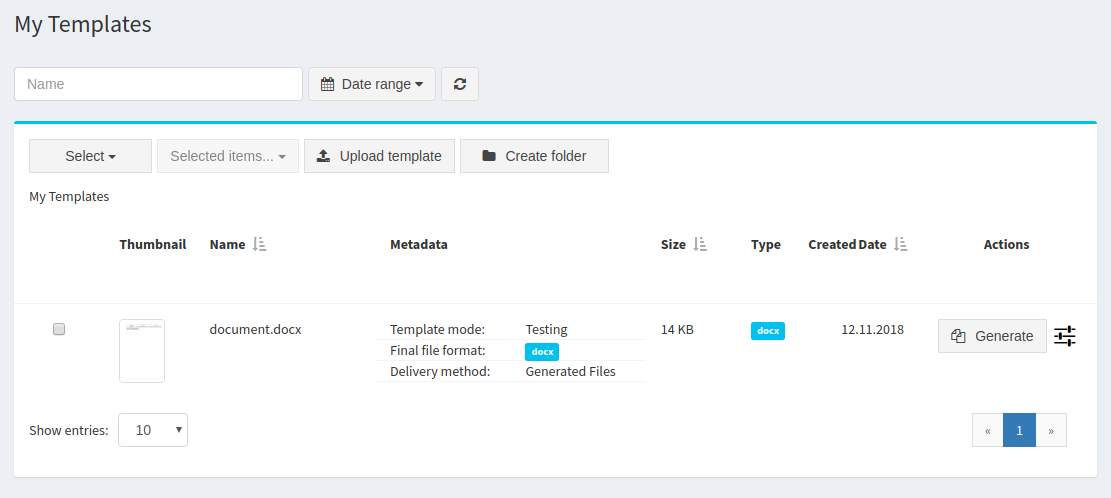
After your template has been uploaded you can see it in the main table.
That's all you need to start using your template. Next step is to prepare actual data for templating.
Step 3: Prepare a data source
Basically, template data is a set of values that correspond to field names that you have defined in placeholders. We will create a CSV file as a data source in our example. For a full list of supported data sources and configuration see Date Sources page.
If you want to go directly to document generation you can download a ready file with data for the template that was created in step 2:
time-off-form_data.csv - data source file
First of all, it is very important that every placeholder that you have defined has a matching value in your data. Otherwise, depending on how you've defined placeholder there could be no value substituted or file generation stopped due to error. More details on this in Placeholders in DOCX page
For this tutorial, it is best to create a CSV file using a simple text editor. However, you will probably want to use MS Excel, LibreOffice or other office editor. If so, make sure that you have configured them correctly to use a comma as a list separator and that date values are in ISO 8601 format (actually, you can use any date format, but in this case, you need to use a formatting function in your placeholder, you can read more about it in Expressions and advanced features topic and in Built-ins for strings FreeMarker documentation).
For example, start writing in your CSV file following:
        Name,Department
        John Doe,Production Department
Pay attention that you usually not need to add any space between values, only commas. Any extra whitespace will be included in the field value.
For example, this:
        Name,Department
        John Doe,   Production Department
Will result in " Production Department" (notice whitespaces) value after substitution
at placeholder ${Department}.
Add values for other fields from the template. When you are done you can check your work with the example data file time-off-form_data.csv.
Step 4: Start document generation and wait for a result
At this moment, you can actually see DocProcessor in action!
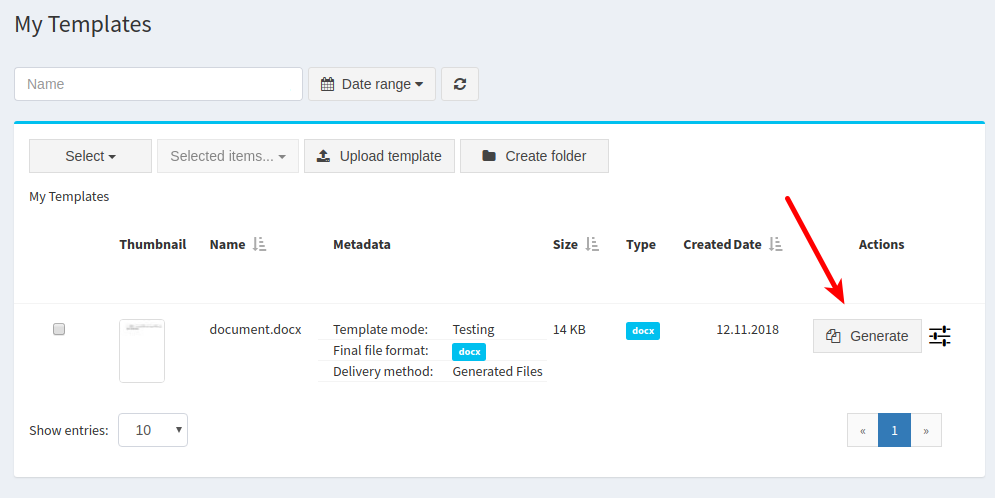
To generate a document from your template go to 'My Templates' page and click on 'Generate' Button:
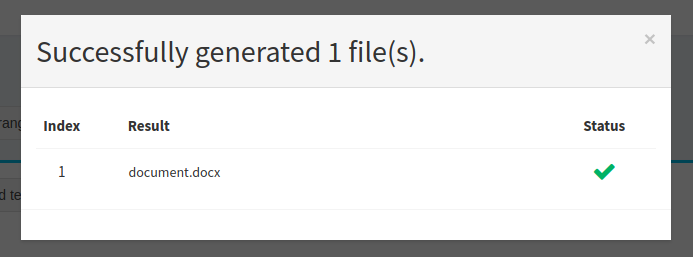
A browser's dialog will be shown where you select a data source file (a CSV file from step 3) and click 'Open'.
Now, click 'Ok' on the confirmation dialog and the file generation process will start. After a short time, you will see a popup with a result:
In case of success, after you close the dialog you will be automatically redirected to the 'Generated Files' page where you will see your generated document:
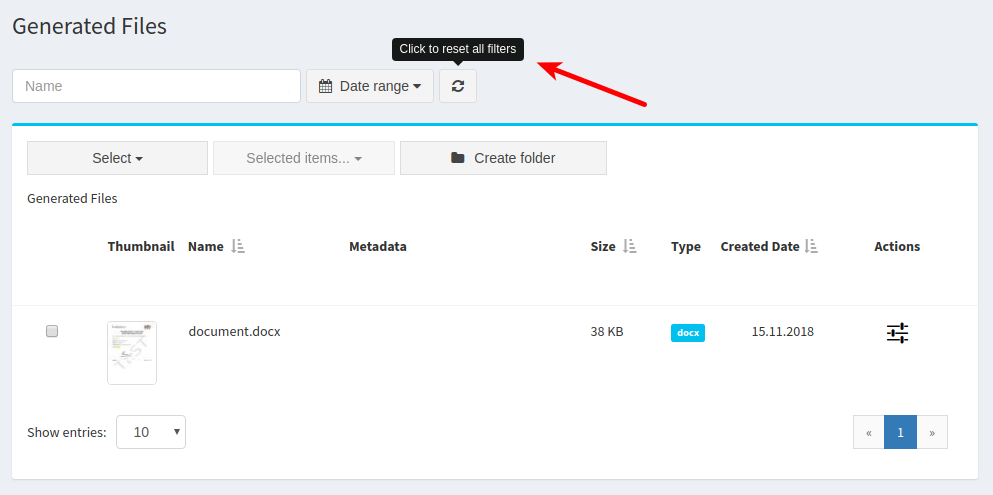
The page will be autoconfigured with a filter to show only your generated file. You can see a hint on the button that resets all filters, click it if you need to see all the other files.
You can click on your file to see it's preview. You will see a large watermark covering it. It means that generation was taken in test mode.
You can read more about how to activate your template in Template Mode topic.
In case an error has occurred
If your generation fails with a result like this:
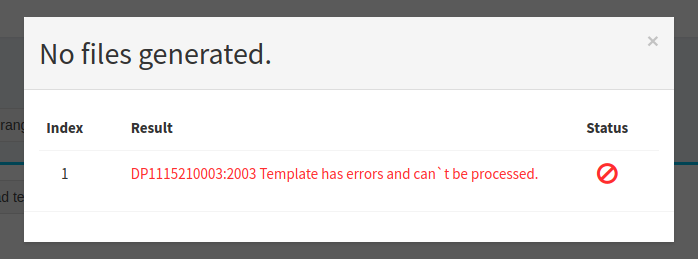
It means that there is some error in your placeholders or data file. Check that all names in placeholders match to fields in your data (case sensitive), check that there are no extra whitespaces or symbols. If nothing helps you can use our example files from steps 1 and 3.
What next?
These are only the basic features about templates. Probably, you have already seen something similar in MS Word mail merge function. But DocProcessor can give you much more. Besides values substitution, you can also repeat part of the document several times, hide it depending on condition, populate a table with data, do various calculations and formatting, and send your documents via email. We support a rich set of data sources and provide an SDK to use our service via REST API. If you have your own content management system you can easily integrate it with DocProcessor.
More tutorials:
Coming soon...