Placeholders In DOCX
Create a placeholder
You can work with placeholders in two ways: using our Add-In that was introduced in Getting started guide or manually. We use standard Mail Merge functionality of MS Word. It means that every placeholder is essentially a Mail Merge field. You can use DocProcessor Add-In to easily create a placeholder in one click. However, you can still open and edit placeholder in a usual MS Word way.
Working with placeholders using Add-In
DocProcessor Add-In is an MS Word template document with macros and buttons. Its features are included inside and you can see them when you open it for editing. However, it is also possible to install this Add-In globally in MS Word so that all Add-In features would be available all the time.
- Download MS Word Add-In for placeholders: DocProcessor.dotm
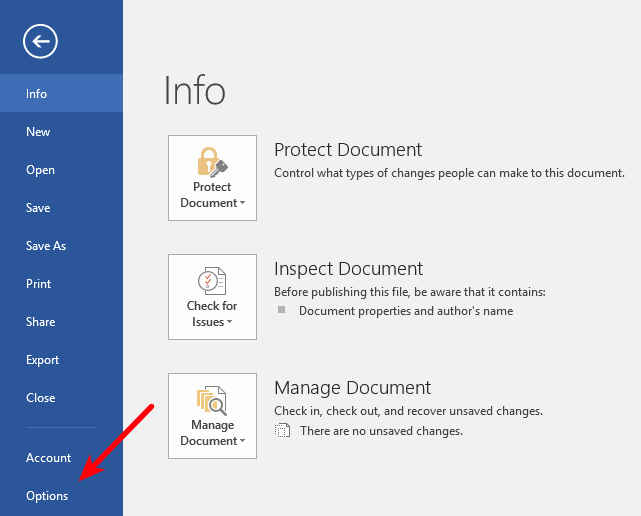
- Open your MS Word, click on 'Files' tab, then choose 'Options' option:
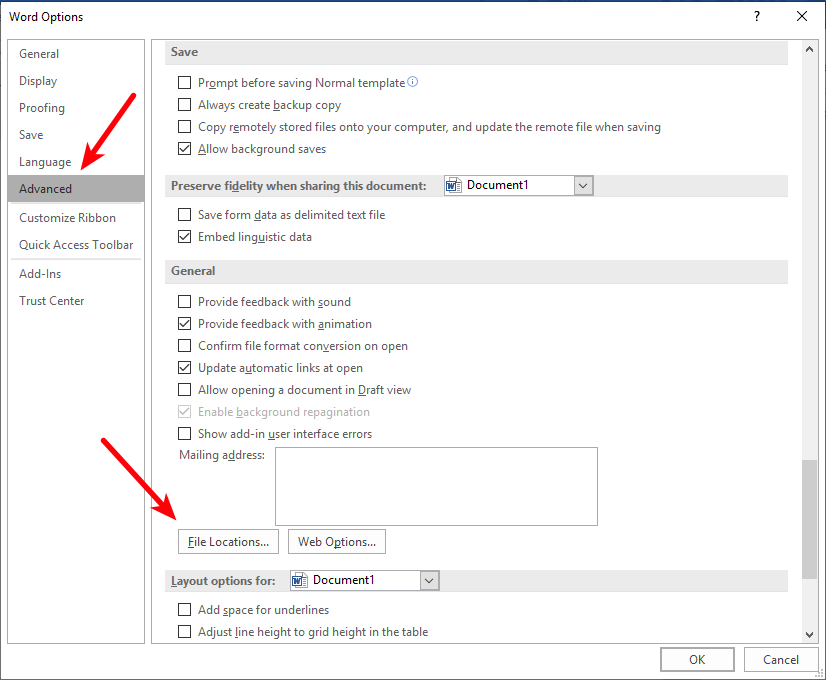
- Then click on 'Advanced' option, scroll down to the 'General' section and click on 'File Locations' button:
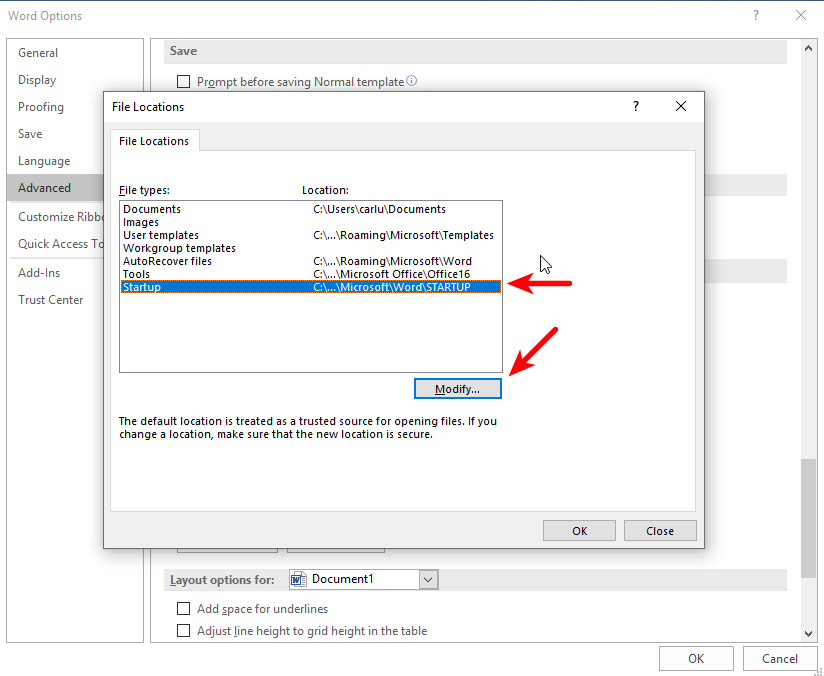
- In the shown dialog, select 'Startup' and click on 'Modify' button:
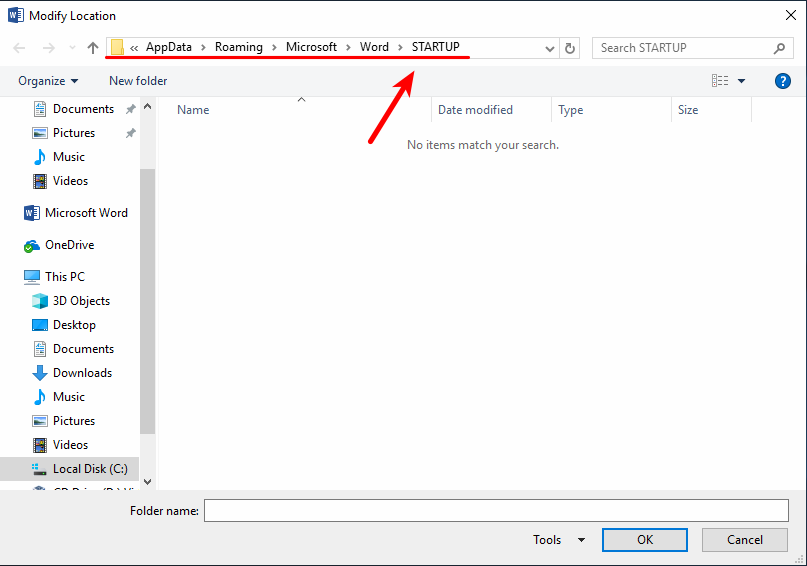
- This is a dialog to choose a folder for MS Word where a user can place a document template (Add-In) to be
loaded on every startup, but we actually need to take a location of the current folder. Copy path value
from the address bar:
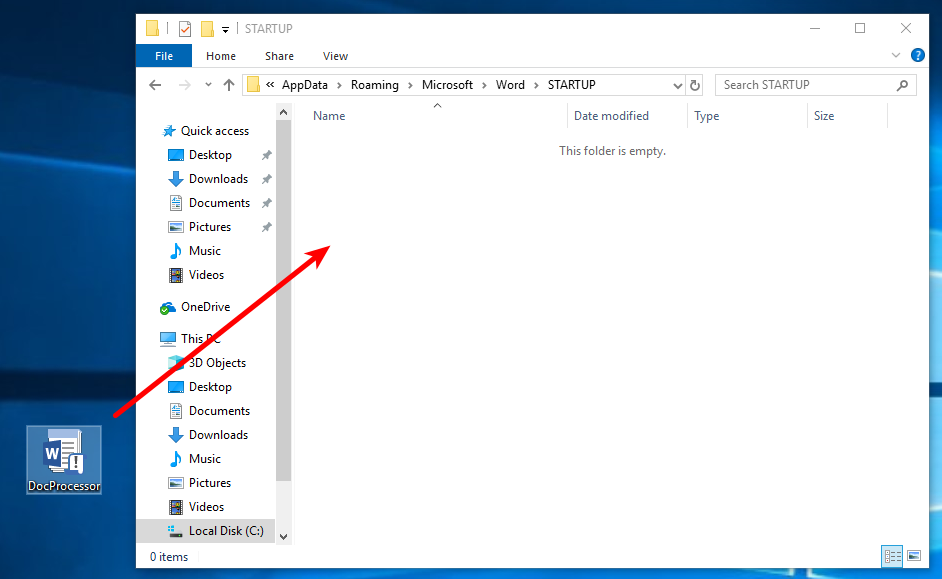
- Then open MS Word 'Startup' folder in Windows Explorer (paste copied path to the address bar) and
simply drag-drop DocProcessor.dotm file into it:
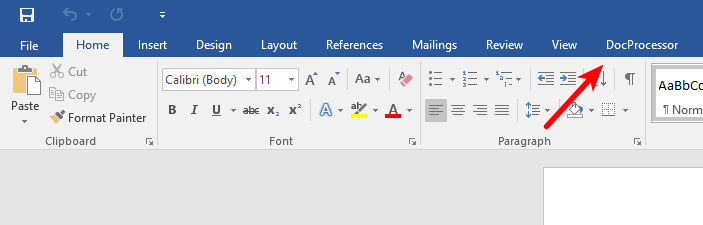
- Restart MS Word so that it updated. Then you can open any document and see that there is a new tab on the
Ribbon:
Working with placeholders manually
It can be useful for you to know how to work with placeholders manually, especially when you need to edit them.
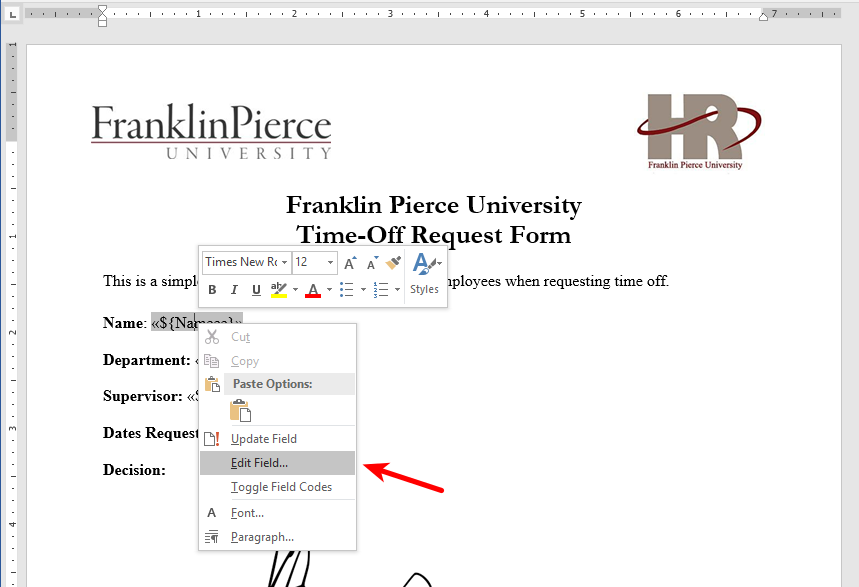
- Suppose we need correct a typo in placeholder:

- Click right button of the mouse inside the brackets and choose "Edit Field…" option
- Choose "MergeField" option from "Field names:" list
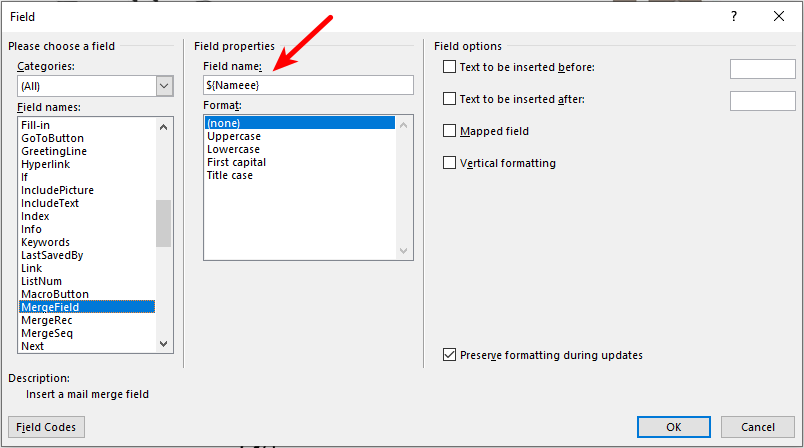
- Here you can edit your placeholder. You must take special care to not delete
${}or[#...]symbols (you can read more about this in Expressions topic). For our example, you need to change${Nameee}to${Name} - And click "OK" button
Remember, you must always edit the value of the placeholder using "Edit field" option, don't try to change it by simply retyping, because in this case, only visual value would be changed and actual merge field value left the same (such a mistake can make you confused, so be careful).
Expressions and advanced features
Placeholders in DOCX documents support FreeMarker template engine. It means you can use special expressions and functions inside placeholder, for example, for formatting and calculations. The effect of these expressions is not limited to placeholder itself, because they can be combined with other placeholders and even change the whole final document look. This gives you a very powerful template possibility, for example, to repeat part of the document several times or hide it depending on some conditions. You can build a very flexible template in one single file that can produce a large set of different documents with little work. To better understand how to create expressions you should have at least basic knowledge of FreeMarker. Actually, it is a quite simple tool if you don't dive into advanced features that it has. It usually used for generating HTML-pages, but it is not limited to them and you mustn't be familiar with this technology. FreeMarker can template any text file and office document is actually a file that contains text the same way as HTML-page does. We recommend you to use following links to learn FreeMarker (you can simply don't think about HTML in this tutorials, see it as a simple text with no meaning):
FreeMarker has advanced features that go beyond the scope of office document templates. To guide what you should use in your templates below are a list of corresponding functionality with explanations and examples. You can use this information in conjunction with official FreeMarker documentation and sometimes it would be necessary for you to read it for more fine level details. We've also prepared a set of ready to use examples which will help you to get started creating your own templates. You can simply get one of the examples and modify it or copy its elements into your own templates.
Using Expressions:
Every FreeMarker expression has a common rule that it must be enclosed in ${}
brackets. For example, you will see a lot of examples in FreeMarker documentation that follows this format.
However, there is no need to type them every time when you create placeholders, because of our MS Word Add-In
adds them automatically. It means that you can take an example of the FreeMarker expression from the
documentation or other source and use it as is just without brackets.
Common expressions:
- If the field doesn't exist, then put default value:
${City!"New York"} - Set default value if the field has no content:
${City?has_content(City, "New York")} - Concatenation of strings:
${Field1 + "," + Field2} - Change value based on condition:
${(Approved=="Yes")?then(Approved, "Declined")} - Make letters uppercased:
${Field1?upper_case} - Type only first 5 characters:
${Field1[0..4]} - Math operations:
${Field1?number + 200}
Using if-conditions:
You can show a part of the document on condition. There are special elements in FreeMarker which are called directives. Directives add you a possibility to change document structure. They are different from simple placeholders because they can span several lines. To define directive you need two elements: the first for directive start and the second for the directive end.
Directives have following general form:
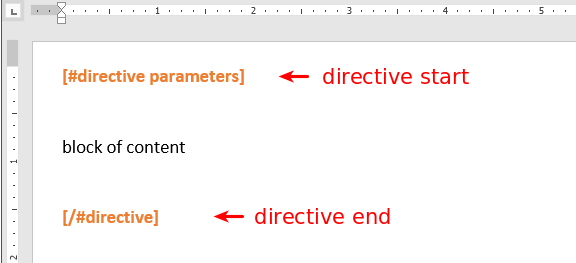
Notice square brackets here. In FreeMarker every directive has a special format: its name is prefixed with # (hash) symbol and it has brackets. For example, you will see a lot of examples in FreeMarker documentation which is like:
[#if] ... [/#if]
or
<#if> ... </#if>
Actually, you don't need to worry about this format, because our MS Word Add-In adds them automatically. You need to know about this only to understand how you can take any example of the FreeMarker expression from the documentation or other source and use it as is just without brackets and # (hash) symbol.
Let's continue with directive. The parameters is a list of values. It can be a field from your data,
but also a result of an expression.
To better understand how all these works let's see an example. We will define a condition and use an
#if directive for this.
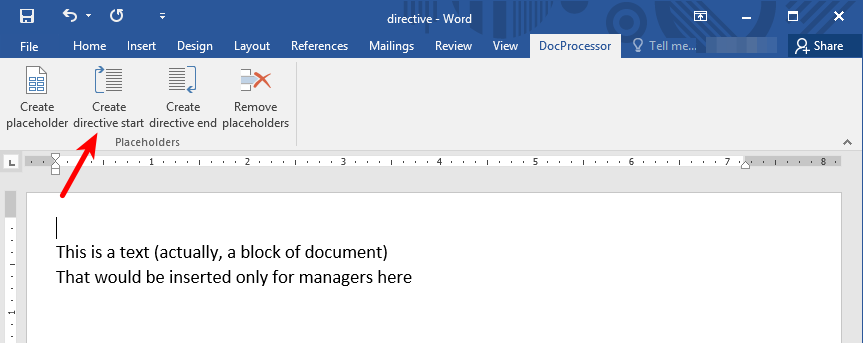
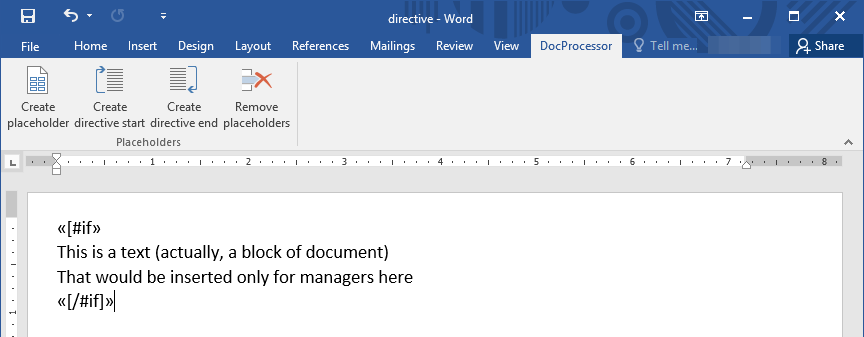
- Imagine a block of text that must be shown only when a document is for a manager. Click on the
'Create directive start' button:
- In the shown dialog write directive value as follows:
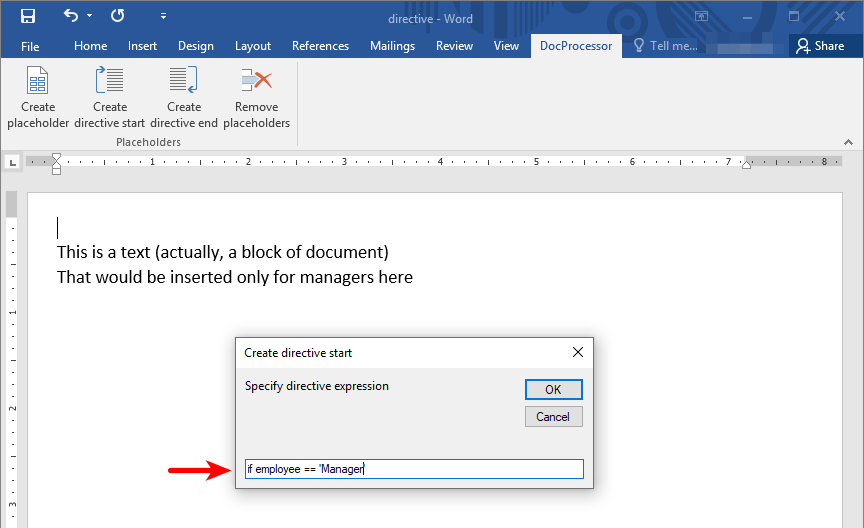
Here we can see that directive takes a result of an expression as a parameter:
employee == 'Manager'This is a comparison expression which can result in 'true' or 'false' value. True makes a block of content to be shown and false will hide it.
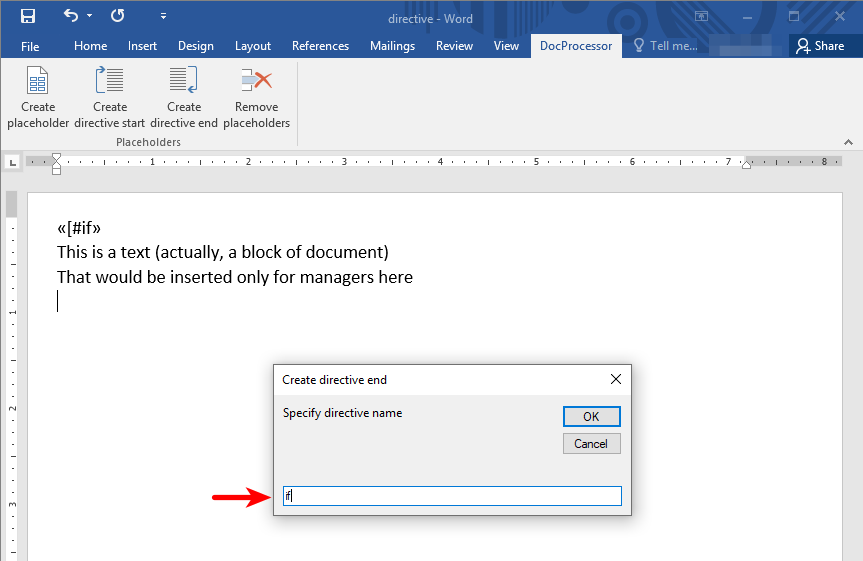
- After this you must define where directive ends and click on the 'Create directive end' button. In this
case you need simply write directive name:
- In the end your directive must look like this:
You can see more examples of #if directive usage in the FreeMarker documentation:
https://freemarker.apache.org/docs/ref_directive_if.html#ref.directive.if
Using lists
You can repeat a part of the document several times. You can even make every repetition to have its own values.
This way you can show a list of items in a document, for example, a list of payments:
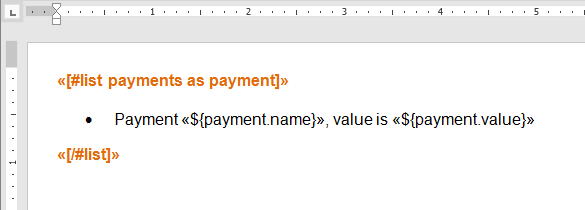
This example shows a generation of a simple list, but actually, you can repeat a large block which can contain not only text but even images.
You can see more examples of #list directive usage in the FreeMarker documentation:
https://freemarker.apache.org/docs/ref_directive_list.html#ref_list_simple
Using tables
You can populate a table with data. All you need is to define only one table-row with placeholders and after generation, you will achieve a full table with all rows generated.
For example, this:
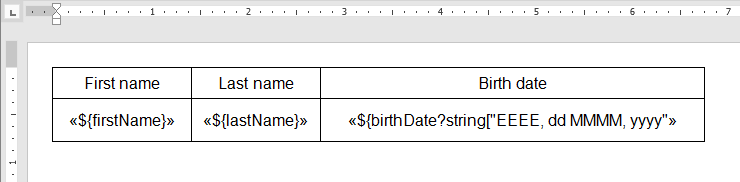
Can produce a table:
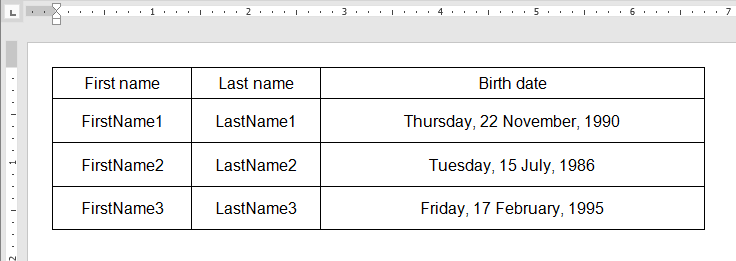
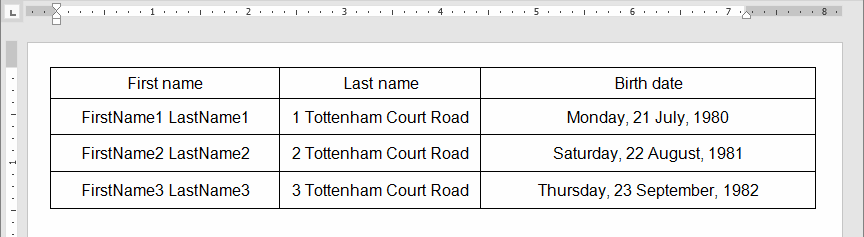
You can also use expressions in placeholders inside the table as well. For example, if you have two separate fields 'FirstName' and 'LastName', you can show both values in one single table column.
For example, this:

Can produce a table:
Nesting directives
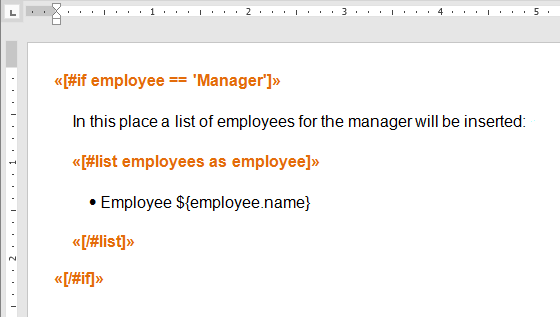
Sometimes, there could be cases when you need to combine multiple directives. For example, you can have
already a condition to show a part of the document, but you also have a list of items inside this part.
This can be easily achieved by nesting #list directive inside #if directive.
For example:
Additional functions
There are an extended set of functions that were added in DocProcessor (they are absent in plain FreeMarker version and you won't find a documentation about them on their site).
They provide some helpful features specific to document templates and data:
util.money.inWords(money, currency, language, amount) - convert money amount from number
to text representation.
For example:
        ${util.money.inWords(100.75, "USD", "ENG", "TEXT")} = 'one hundred dollars and seventy-five cents'
        ${util.money.inWords_EN(1200.35)} = 'one thousand two hundred dollars and thirty-five cents'
lang.number(number) - convert string to a number. If the value is null, empty or incorrect
then 0 will be returned.
For example:
        ${lang.number("125.75")} = 125.75
        ${lang.number("abc")} = 0
        ${l.n("100.0.")} = 0
lang.bool(boolean) - convert string to a boolean. If the value is null, empty or incorrect then
false will be returned.
For example:
        ${lang.bool("true")} = true
        ${lang.bool("yes")} = true
        ${l.b("abc")} = false